Let’s get started! How to ‘cast on’ to your basket base.
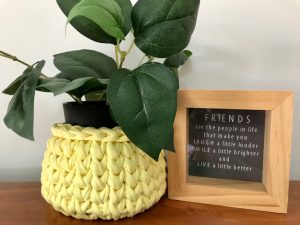
Congratulations! You have probably just purchased your first basket base and are thinking, ‘Now how am I supposed to use it?’
Well…you’ve come to the right place!
This is an in depth tutorial for new crocheters, with limited basket making experience. If you are a seasoned basket maker, you might prefer to check out the instructions here. If you are a ‘watch it for real’ learner like me, click here to view the full video tutorial which will show you how to make your basket, from start to finish (or you can just skip to the parts you need).
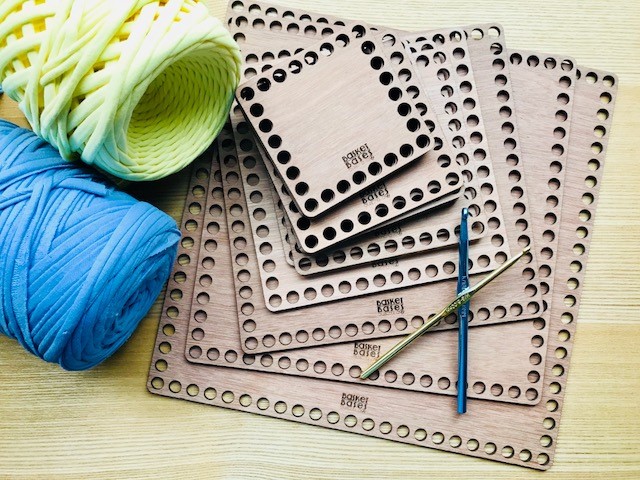
You will need:
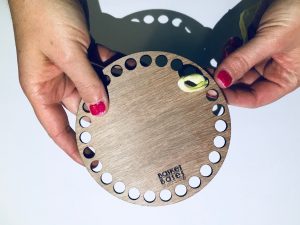
Basket base (I am using a 12cm base in the tutorial, but you can use any size – the process is exactly the same).
T-shirt yarn
A 5mm crochet hook to ‘cast on’
A 7 or 8 mm crochet hook for the basket walls
A small crochet hook (ie. 3.5 or 4mm hook) to weave in the end

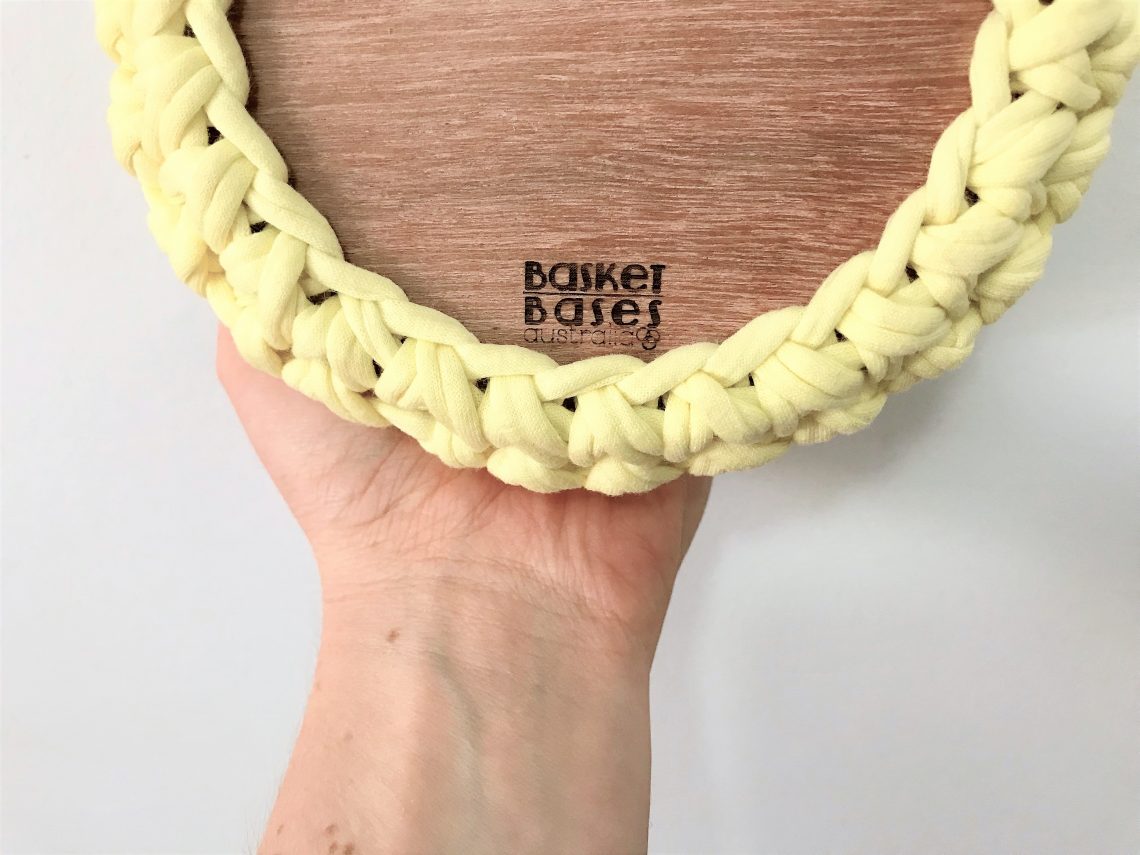
Note: *You will be working on the underneath of the base to begin. So hold the base with the side you want to be the ‘outside’ of the basket facing toward you.*
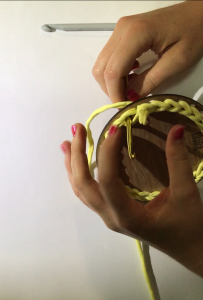
Step 1:
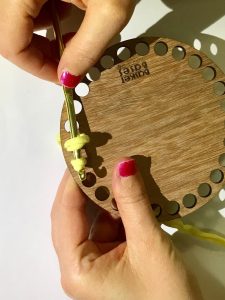
Make a loop with the end of the t-shirt yarn, leaving about 6cm of ‘tail’.

Step 2:
Push the loop through a hole, towards yourself.
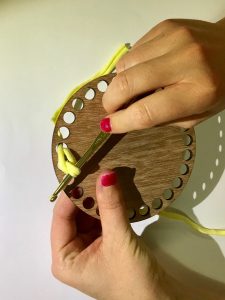
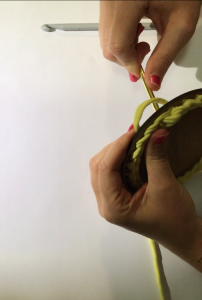
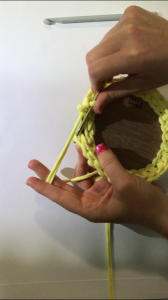
Step 3: Insert hook into the loop. Pull yarn loop gently from behind to secure.
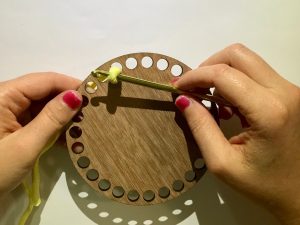
Step 4: While keeping the hook inside the first loop, push hook into the next hole (to the left of the hook).
Step 5. Collect the yarn (not the tail end) on the hook, and draw it back up through the hole. Then, keeping the yarn on the hook, draw it through the loop from the previous hole.
This is called a ‘slip stitch’.
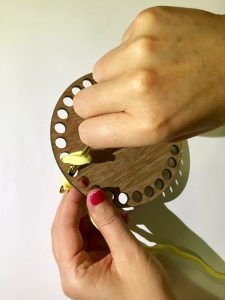
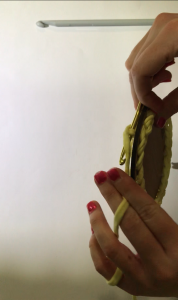
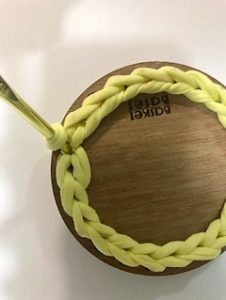
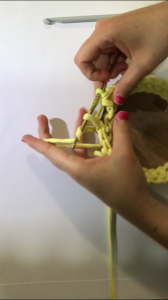
Repeat the slip stitch process (steps 4 and 5) all the way around the base.
Step 7:
When you reach the last hole before the first slip stitch, remove the hook from the yarn loop. Insert hook in the beginning hole, but from behind (through the first slip stitch). Collect the empty loop with hook and pull it back through the hole.
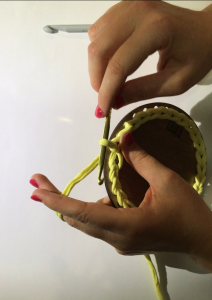
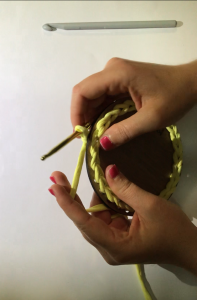
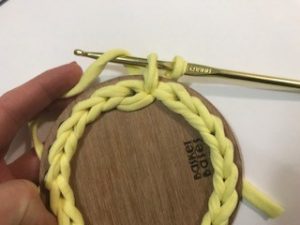
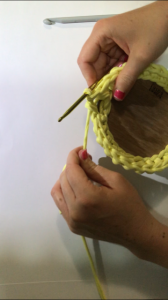
Step 8:
Wrap the yarn over the hook (this is called ‘yarn over’) and pull the yarn through the loop already on the hook. This is called ‘making a chain’. Congratulations! You have completed your first round!
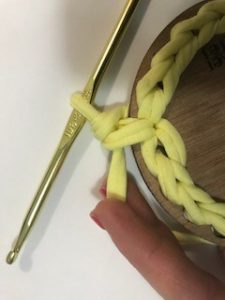
Step 9:
Insert hook into the hole directly under the hook (the hole you first started in, pushing hook through the middle of the slip stitch.
This part can be a little fiddly, but it gets easier with practice.
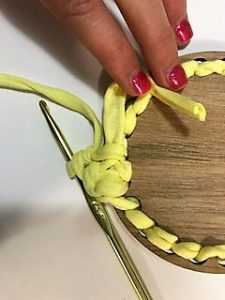
Step 10:
Collect the yarn on the hook and draw it back up through the hole.
Step 11:
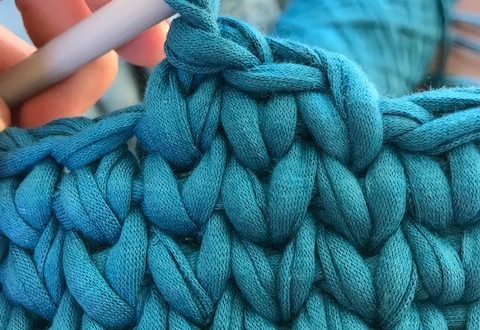
Yarn over, and draw the yarn through the two loops on the hook. This is called a ‘single crochet’ stitch.
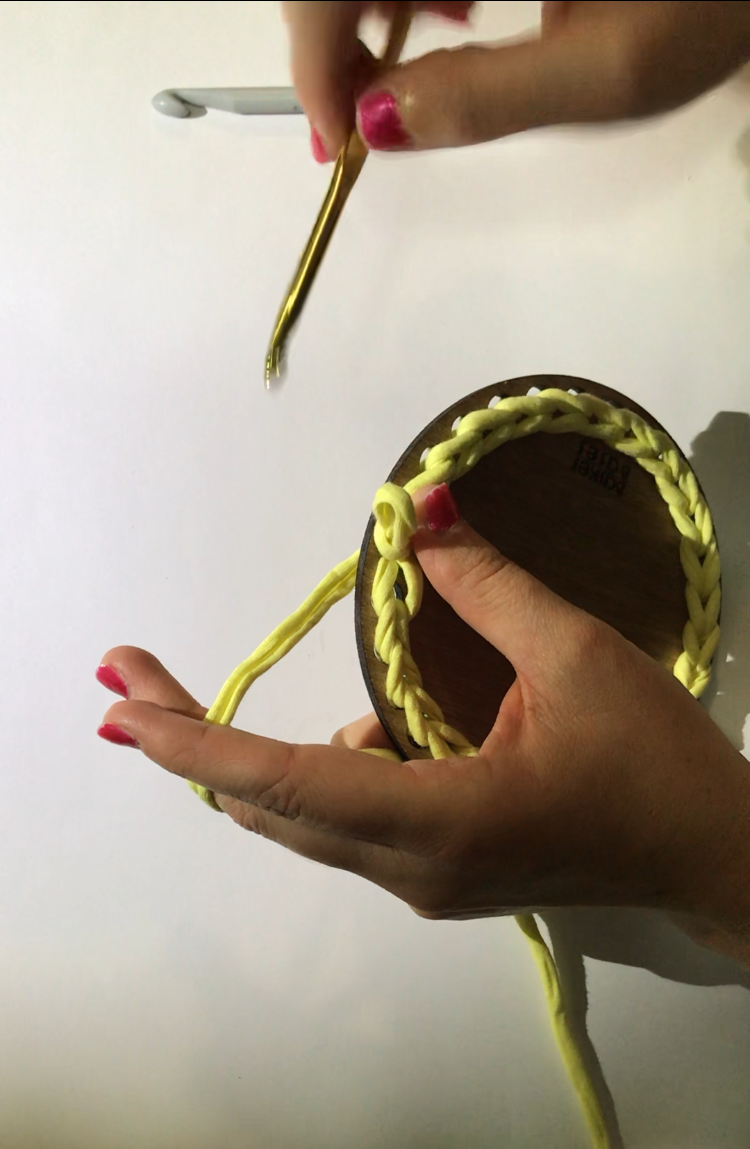
Step 12:
As you go, trap the ‘tail’ end of yarn under your stitches to hide it. Insert hook into the next hole and continue to single crochet all the way around (repeat Step 10-11).
Step 13:
When you reach the last hole, insert the hook into the back loop only of the next stitch. Collect the yarn and pull it back through, then yarn over and pull through the two loops on the hook.

You have now finished ‘casting on’ to your base and are ready to make your basket walls! Don’t forget to change here to your larger hook, and stay tuned for the next tutorial. If you just can’t wait, the video tutorial shows the entire process, beginning to end.
Happy crocheting!